The boat has been in the factory for over two weeks now. Workers have been busy removing the windows, painting the interior and prepping the deck and underside for new paint.
David has been busy with his own projects. He is performing a 1,000 hour service on the diesel engines. Most of you know that David is mechanically inclined, but some of you might not know that a couple of years ago he took a diesel mechanics course at the local community college in anticipation of cruising. He has also been busy working with the marine electrician designing the electrical system and doing lots of research and decision making on the electronics.
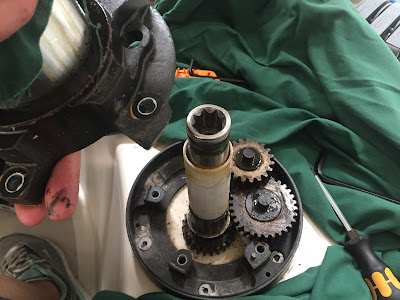
With else everyone busy, I needed something to do. When we were on the water I could always find a project to keep me occupied (something always seems to need to be organized, cleaned, or polished). But now that we are in the factory I've been struggling with how to help. I've spent some time as David's "helper" fetching tools and other needed items while he is trapped in the engine compartment. But I really wanted to find something a little more useful. David suggested I service the four winches, which is basically disassembling, cleaning, lubricating and reassembling.
I was up for the challenge! I studied manufacturer diagrams on the web, watched a few YouTube videos, went shopping for a few supplies, armed myself with screwdrivers and hex keys, and was ready to go!
 |
| Here we go! |
 |
| Hey, this has way more parts than the one on YouTube! |
 |
| This thing is like a Russian doll. When will it end? |
 |
| Getting greasy |
After completing all four winches, here are some lessons learned:
- There is no such thing as taking too many pictures during disassembly to assist with reassembly.
- Be sure that photos are taken such that orientation is easily ascertained.
- My husband is very patient, along with having WAY more knowledge, expertise and experience than I. He did sweetly point out that I was 46 before I witnessed my first winch servicing (via video) whereas he has seen and done them pretty much his entire life, which did make me feel better.
- Staring at photos and diagrams won't answer all of your questions. Sometimes you just have to go the trial and error route.
- Trust your instincts.
- There are times when curse words are the only useful words. Like when I can't get those #&*$! springs to stay in the @^%! pawls.
- Cover your work when you go to lunch, particularly if there is a chance someone might be sanding on the deck above you while you are gone. (More #*!@? words!)
- There is definitely a learning curve with each one getting easier.
 |
| Nice and clean and ready to be put back together. |
Love the blog, thanks for sharing in G+ so I see them! Very proud of you getting in there and working on those winches yourself - and wow do they look shiny and clean in that last photo! Great job! Keep up the great blogging and photos!!
ReplyDeleteThis comment has been removed by a blog administrator.
ReplyDelete